Showing posts with label cheap. Show all posts

Saturday, January 5, 2013

Football Wreath

So, the Redskins are in the playoffs! Hail to the redskins, hail victory... etc. Anyway, I undecorated for Christmas and was left with a void on my front door. Thus, the idea of the Redskins wreath was born.

The Finished Product:


What You Will Need:


  •  Spray paint, spray primer, spray sealer
  • Wood paint for the letters
  • Wooden letters
  • Wooden shapes
  • Felt
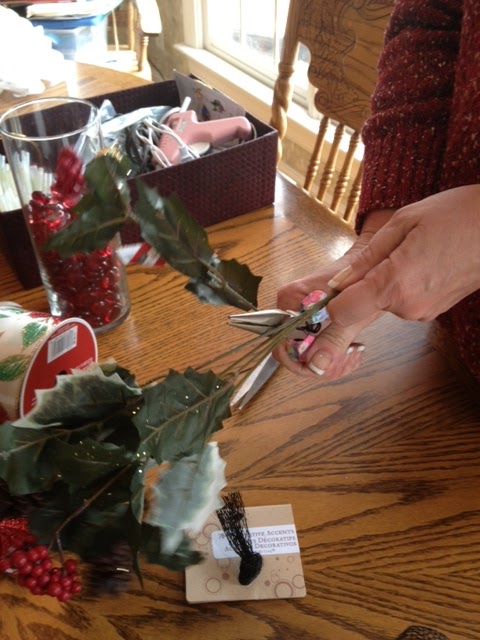
  • Not pictured: glue gun, scissors, and bowls of various sizes to trace

 Let's Get Started:

1. Spray prime, spray paint, and seal your wreath in whatever base color you chose. I hope by now you know how to spray paint, so no picture.
2. Spray prime your wooden letters and let dry for about ten minutes.
3. I used a sponge brush to paint the letters burgundy, but if you want a more even coverage, go with spray paint.
4. Making the felt flowers was all my mama's handiwork. First she traced a large circle onto the felt.
5. Then she drew a spiral onto the circle.
6. She cut out the circle in the spiral
7. Then she rolled the spiral starting from the OUTSIDE to the INSIDE.
It winds up like this:
8. Then we arranged our letters, flowers, and shapes and hot glued them to the wreath.
9. Then we added a ribbon from our stash to hang it with.
10. And voila! We are DONE. The whole project cost approximately $14 and took an hour and a half.


As always, thanks to my mama for her loving patience and execution. I'm really a planner, she's a doer.


Sunday, December 16, 2012

Easy Gift Plaque

So, I wanted to be crafty for Christmas. I have made all of the gifts for our family. However, you don't get to see any of them until after Christmas because they all read my blog! All, of course, except my dad. He does not read blogs, so you get to see his gift. Hurray!

The Finished Product:


What You Will Need:


  • Wooden plaque - I got mine from Michael's and used my 50% off coupon. SCORE.
  • Spray primer
  • Any color of spray paint in matte
  • Wooden decorations
  • Picture stand ($3 from Michael's - I just love that place)
  • Not pictured - spray finishing gloss
  • Not pictured - wood glue
  • 8.5" x 11" Card stock
  • Pazzle, Cricut, Sillouette, or Xacto Knife and stencil
  • Sponge brush
  • Acrylic paint

Let's Get Started:


1. Spray your plaque with primer.
2. Let dry for about 10 minutes, spray with your color. I only did one coat because I did a really good coat of primer and didn't need to. Thank goodness for primer.
3. Leave plaque to dry.
4. Pick your quote and fire up your Pazzle, Cricut, Sillouette, or grab your Xacto knife and stencil. I decided on a font and then cut it out of card stock.
5. I love my mom's Pazzle, but I always have to do some trimming.
 6. Lay your newly created stencil on top of your (now dry) plaque. Mine didn't move, so no worries about tacking it down. Start sponging your paint lightly into the stencil. Be sure to use only a small amount of paint or it will bleed through the stencil (Oops, I did that - oh well, it makes it more homemade-y ...right?)
7. Carefully pick up your stencil.
8. Adhere your wooden decoration using wood glue.
9. Allow to dry for a few hours and VOILA!


As always, thanks to my beautiful mama, who is my loving and faithful assistant/master crafter!


Sunday, November 18, 2012

Christmas Flowers

So, we really were NOT going to do a craft today. We just got back from a long vacation (I know, poor us) and we just needed to take a weekend to recover. However, we were walking from Target to the Dollar Tree and we passed Michael's. I saw these shiny flowers and we got sucked in. You can thank the outdoor Michael's display for this one...

The Final Product:


 What you will need:


(the picture won't upload, so use your imagination)
  • Colored marbles or stones
  • Christmas-y silk flowers
  • Ribbon
  • A cheap vase (ours is from the Dollar Store!)
  • Floral Wire


Let's Get Started:


1. First fill your vase all the way up with your marbles.
2. Cut all your silk flowers from their stems.
3. Now, my mom is the pro flower arranger (I take pictures) and she says that you should put the tallest flowers and plants in the center of the arrangement.
4. Go pet your puppy (oh wait... that's just for me)
5. Finish arranging your flowers.


6. Make your bow. (Next week there will be a tutorial on how to make the beautiful holiday bows that my genius mother can create).
7. Add bow to arrangement.
8. VOILA!


Enjoy the Christmas-ness.


All the credit for this project goes to my mama... she's fabulous.


Sunday, October 7, 2012

Key Hanger

So, I received TWO, count them TWO, gift cards to Michael's for my birthday. WHAT?! I love that place. My friends and family are geniuses (I always suspected)! So I went in search of a craft for my blog. This is what I came up with (you can all thank my sister, Emily and my friend, Christie... you're welcome):

Here's What You Will Need:


  • Wooden plaque of some sort
  • Wood letter
  • Gray spray paint primer
  • Whatever color spray paint you want
  • Sponge brush
  • Small command hooks

Let's Get Started:


1. Spray your plaque with primer (sorry, I forgot to take pictures of this step!) Allow to dry for about ten minutes.
2. Spray your plaque with your spray paint. This may take a couple of coats. Mine took about three coats and still wasn't completely covered, but I am impatient, so I stopped at that point.
3. Paint the outside using your sponge brush. Allow to dry completely.
4. Adhere the letter to the plaque using wood glue.
5. I had to allow the wood glue to cure for several hours, but I am glad I did because it is super strong. I also used the wood glue to stick the command hooks to the back of the plaque.
6. Then I added a picture hanger to the back and hung it up!
VOILA!

Sunday, September 23, 2012

Days of the Week Baskets

So, Rob and I have been trying to eat at home more. We have been planning our meals and then swearing we eat them at home. I have been grouping everything in the pantry. Last weekend, it occurred to me that I needed a better way to do it so I could see what I had. Thus, the idea of the baskets was born. Eventually I want to add a bar and hang them up. But this works for now. 

The Finished Product:


What You Will Need:


  • 7 Dollar Store Baskets
  • Pretty paper
  • Cricut, Pazzle, or pre-cut letters
  • Laminating machine (optional)
  • Hole Punch
  • Ribbon

Let's Get Started:


1. First you need to cut out your tags. We used the Pazzle machine, but you can cut them by hand, with a Cricut cutter, or even use dye-cuts. Be creative!
2. My tags had two pieces, so I had to stick them together. Don't worry if your pieces curl, we are going to laminate them and that will flatten them.

3. Laminate tags. We have a laminating machine, but I have heard that there are cold-laminate kits out there that may be cheaper to get started with.
4. Punch holes in the tags and use ribbon to tie them to baskets. DONE.


Now I can bring my groceries home and throw them in the baskets for the days I need them on. On the day I want to make that, I can just grab the basket and I have all the non-refrigerated items! VOILA!

PS. Thanks to my mom for getting these baskets from the Dollar Store for me!

Saturday, July 21, 2012

Hanging Bow Organizer

Remember the bows on alligator clips we made last week? Well, the ones my mom and I made are going to make their way into a 14 year old's posession. She obviously needs something to organize them on. So, we decided to give her that, too!

The Finished Product:


Here's What You Will Need:
  • 1 Canvas of any size (we bought 5 for $20 at Michael's and we used a 25% off coupon. Cha Ching!)
  • Approximately 1 yard of fabric in any color
  • Approximately 1 yard of batting 
  • A couple of yards of ribbon in any color or width that you are interested in
  • Staple gun
Let's Get Going:

Disclaimer: we just kind of winged it on this one. There are no real measurements.

1. Lay fabric face down on a large flat surface.
2. Lay batting down on top of the fabric.
3. Lay canvas face down in the center of both the batting and the fabric.
4. Cut the batting and the fabric at the same time around the outside of the canvas, we left about 3.5 inches on all sides.

5. Pull the fabric and batting together tightly around the back of the canvas.
6. Use staple gun to secure fabric to the back of the frame. Note: on the corners we folded the fabric and batting together like a present to keep it from bulging on the front.

7. Optional: Trim fabric on the back if you are a perfectionist like my mom (no one sees the back, fyi.)
8. Where you put the ribbons is up to you, we chose to put them long ways and make the canvas portrait style. You can do it however you want. Either way, secure ribbon to the back of frame with staple gun.

9. Add your hair clips! VOILA!


This project took us about ten minutes from start to finish. We had fabric, batting, the ribbon, and the staple gun at home. If you don't have a staple gun at home, you could use small finishing nails and a hammer. Since we purchased 5 canvases for about $15 (after the discount), each canvas cost approximately $3.

PS. Thanks to my mom for modeling for all of my pictures!